


Modern software development relies on rapid collaboration, continuous integration, and automated quality checks. As organizations adopt DevOps practices and Continuous Integration/Continuous Deployment (CI/CD), developers need immediate feedback on every code change before it reaches production. One of the most effective ways to achieve this is by integrating Jenkins with GitHub Pull Requests, enabling automated build notifications directly within GitHub.
Instead of manually checking Jenkins after every commit, developers can instantly view whether a pull request has passed or failed its build, helping them identify issues earlier and maintain high code quality. This reduces context switching, accelerates code reviews, and ensures that only validated code is merged into the main branch.
For organizations managing multiple repositories, distributed development teams, or enterprise-scale applications, integrating Jenkins with GitHub is no longer just a convenience—it’s a critical component of an efficient DevOps workflow.
Organizations building mature CI/CD ecosystems should first understand Continuous Integration and Continuous Deployment (CI/CD) to establish automated software delivery pipelines that improve quality, collaboration, and deployment speed.
In this comprehensive guide, you’ll learn how to configure Jenkins to send automated build notifications to GitHub pull requests, understand the underlying workflow, explore best practices, troubleshoot common issues, and optimize your CI/CD pipeline using modern DevOps practices.
Why Integrate Jenkins with GitHub Pull Requests?
Code reviews are significantly more effective when reviewers know whether the latest changes have successfully passed automated validation.
Without build notifications, developers often need to:
- Switch between Jenkins and GitHub
- Manually verify build status
- Wait for team updates
- Merge code without complete validation
- Investigate failures after merging
Integrating Jenkins with GitHub eliminates these inefficiencies by automatically displaying build results directly inside each pull request.
Every code change receives immediate feedback, allowing teams to resolve issues before merging into production branches.
Key Benefits of Jenkins Build Notifications
A properly configured Jenkins-GitHub integration delivers measurable improvements across the software development lifecycle.
Faster Developer Feedback
Developers immediately know whether their latest commit has:
- Passed all build stages
- Failed compilation
- Broken automated tests
- Triggered deployment issues
Early feedback reduces debugging time and accelerates development cycles.
Improved Code Quality
Automated validation prevents unstable or untested code from being merged.
Benefits include:
- Fewer production defects
- Higher release confidence
- Better collaboration during code reviews
- Improved software reliability
Better Collaboration
Instead of exchanging messages about build status, everyone involved in the pull request can view the latest build outcome directly within GitHub.
This improves visibility for:
- Developers
- Reviewers
- QA teams
- DevOps engineers
- Project managers
Faster CI/CD Pipelines
Automated notifications become an essential part of mature CI/CD workflows.
Organizations looking to build scalable automation pipelines should also explore DevOps Pipeline Guide to understand how modern CI/CD pipelines streamline software delivery from code commit to production.
How Jenkins and GitHub Work Together
The integration between Jenkins and GitHub follows a simple but highly automated workflow.
Developer Creates Pull Request
│
▼
GitHub Webhook Triggered
│
▼
Jenkins Pipeline Starts
│
▼
Checkout Source Code
│
▼
Build Application
│
▼
Execute Automated Tests
│
▼
Security & Quality Checks
│
▼
Build Successful? ─────── No ─────────► ❌ Failure Status Sent to GitHub
│
Yes
│
▼
✅ Success Status Sent to GitHub Pull Request
This automated feedback loop helps development teams detect problems earlier, shorten review cycles, and maintain a healthier codebase.
Prerequisites Before You Begin
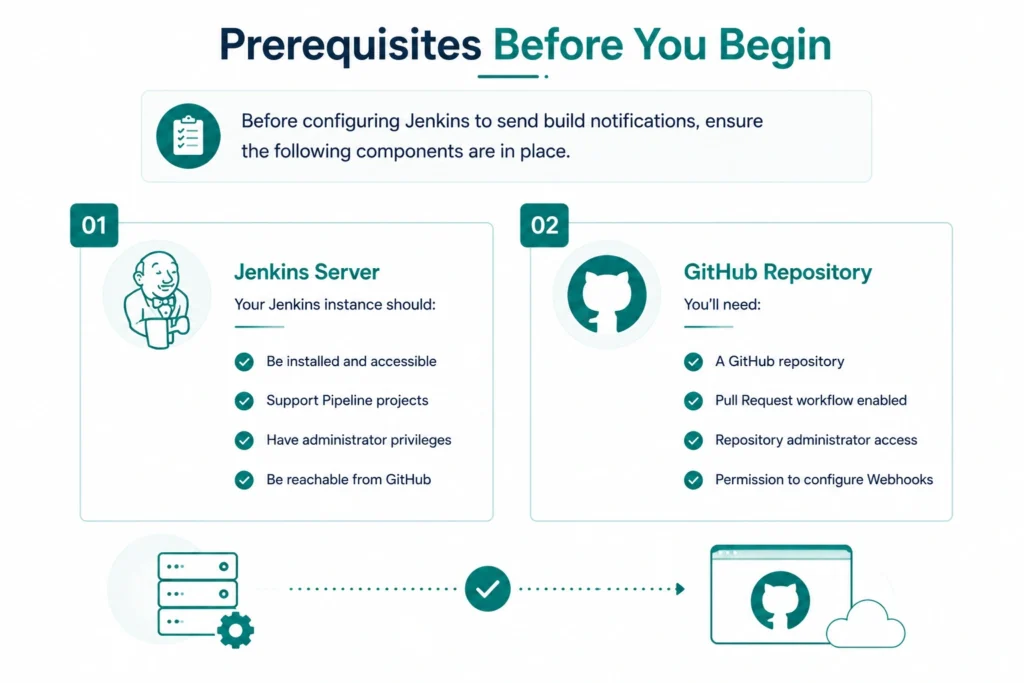
Before configuring Jenkins to send build notifications, ensure the following components are in place.
Jenkins Server
Your Jenkins instance should:
- Be installed and accessible
- Support Pipeline projects
- Have administrator privileges
- Be reachable from GitHub
GitHub Repository
You’ll need:
- A GitHub repository
- Pull Request workflow enabled
- Repository administrator access
- Permission to configure Webhooks
Required Jenkins Plugins
Install the following plugins before configuring the integration:
| Plugin | Purpose |
| Git Plugin | Connect Jenkins to Git repositories |
| GitHub Plugin | Integrate Jenkins with GitHub repositories |
| Pipeline Plugin | Execute Jenkinsfile pipelines |
| HTTP Request Plugin | Send build status updates to GitHub |
| Generic Webhook Trigger | Receive GitHub webhook events |
| Credentials Plugin | Securely manage GitHub tokens |
Keeping plugins updated ensures compatibility with the latest GitHub APIs and Jenkins releases.
GitHub Personal Access Token (PAT)
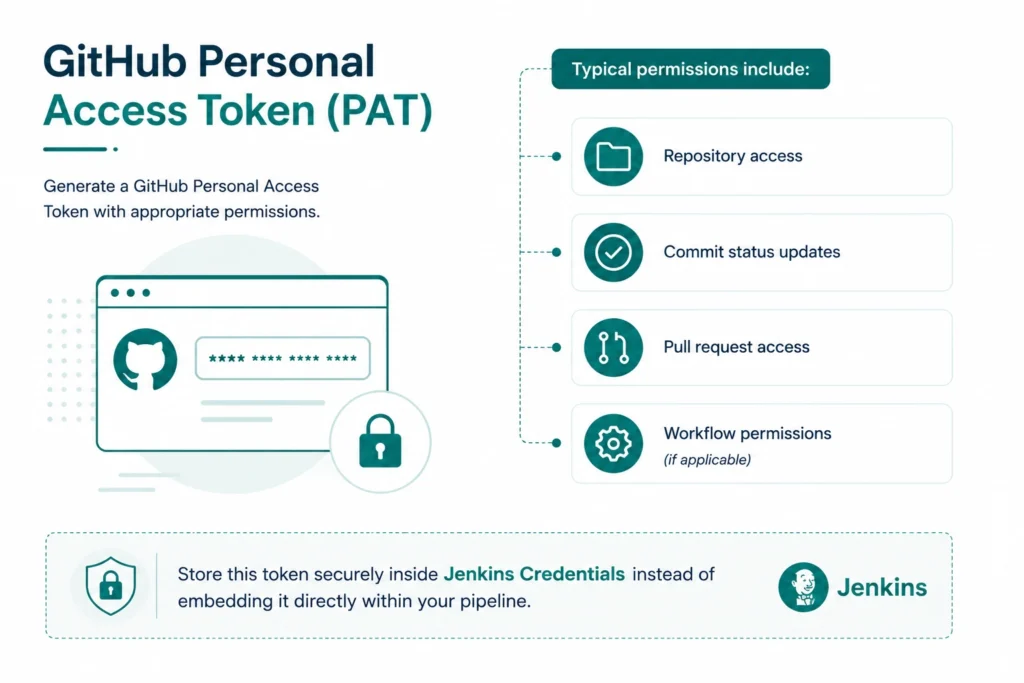
Generate a GitHub Personal Access Token with appropriate permissions.
Typical permissions include:
- Repository access
- Commit status updates
- Pull request access
- Workflow permissions (if applicable)
Store this token securely inside Jenkins Credentials instead of embedding it directly within your pipeline.
Why This Integration Matters for Modern DevOps
Modern software teams release code far more frequently than they did just a few years ago.
As deployment frequency increases, manual verification becomes both inefficient and error-prone.
Automated Jenkins notifications help organizations:
- Accelerate pull request reviews
- Prevent broken builds from being merged
- Improve deployment confidence
- Reduce manual communication
- Increase developer productivity
- Strengthen collaboration across distributed teams
Organizations looking to further optimize automated software delivery should also explore DevOps Automation Best Practices to understand how automation improves consistency, reliability, and release velocity across enterprise DevOps environments.
Why Organizations Choose MicroGenesis for CI/CD Automation
Implementing Jenkins-GitHub integration is only one part of building a high-performing DevOps ecosystem. Organizations also need scalable CI/CD pipelines, secure automation, standardized workflows, and seamless integration across their development toolchain.
MicroGenesis helps organizations modernize software delivery through end-to-end DevOps consulting, CI/CD implementation, Jenkins optimization, GitHub integration, Infrastructure as Code (IaC), DevSecOps, and cloud-native automation. Our experts design resilient DevOps pipelines that improve collaboration, accelerate deployments, and enhance software quality while reducing operational complexity.
Step 1: Set Up a Jenkins Pipeline
A Jenkins pipeline defines the complete workflow for building, testing, and deploying your application. Using a Jenkinsfile, you can automate every stage of your CI/CD pipeline while ensuring consistency across development environments.
When integrated with GitHub, the pipeline becomes the engine that validates every pull request before it is merged into the main branch.
Create a Pipeline Project
To create a Jenkins pipeline:
- Log in to your Jenkins dashboard.
- Select New Item.
- Enter a project name.
- Choose Pipeline.
- Click OK.
- Configure the project according to your repository requirements.
- Under Pipeline, select either:
- Pipeline script
- Pipeline script from SCM (recommended for production)
Using Pipeline script from SCM allows Jenkins to automatically load your Jenkinsfile directly from your Git repository, ensuring that your pipeline configuration remains version-controlled alongside your application code.
Example Jenkins Pipeline
pipeline {
agent any
parameters {
string(name: ‘commit_sha’, defaultValue: ”, description: ‘Commit SHA of the PR’)
}
stages {
stage(‘Checkout Code’) {
steps {
git branch: ‘master’, url: ‘https://github.com/your-repo/project‘
}
}
stage(‘Build’) {
steps {
echo ‘Building…’
// Add your build commands here
}
}
}
post {
success {
echo ‘Build Successful’
}
failure {
echo ‘Build Failed’
}
}
}
Understanding the Pipeline
Each section of the Jenkinsfile has a specific purpose.
| Section | Purpose |
| agent | Specifies where the pipeline executes. agent any allows Jenkins to run on any available executor. |
| parameters | Accepts the Git commit SHA so Jenkins knows which pull request should receive the build status. |
| stages | Organizes the pipeline into logical phases such as checkout, build, testing, and deployment. |
| post | Executes actions after the pipeline finishes, regardless of whether the build succeeds or fails. |
Keeping stages modular makes pipelines easier to maintain and troubleshoot as projects grow.
Step 2: Configure GitHub Webhooks
GitHub Webhooks enable real-time communication between GitHub and Jenkins.
Whenever developers create, update, or reopen a pull request, GitHub automatically sends an HTTP request (webhook) to Jenkins, triggering the pipeline without requiring manual intervention.
Without webhooks, Jenkins would need to poll GitHub continuously, consuming unnecessary resources and increasing build latency.
How GitHub Webhooks Work
Developer Pushes Code
│
▼
GitHub Pull Request Updated
│
▼
GitHub Sends Webhook
│
▼
Jenkins Receives Event
│
▼
Pipeline Starts Automatically
This event-driven architecture enables faster feedback and a more responsive CI/CD pipeline.
Configure the Webhook in GitHub
Follow these steps:
- Open your GitHub repository.
- Navigate to Settings → Webhooks.
- Click Add webhook.
- Configure the webhook as follows:
| Setting | Value |
| Payload URL | http://<your-jenkins-server>/generic-webhook-trigger/invoke |
| Content Type | application/json |
| Secret | Optional but recommended |
| SSL Verification | Enable whenever possible |
| Events | Pull Requests (or Push Events if required) |
After saving, GitHub immediately sends a test payload to Jenkins.
Verify Webhook Delivery
GitHub provides detailed delivery logs that help verify communication.
Navigate to:
Repository → Settings → Webhooks → Recent Deliveries
You should see:
- HTTP Status 200
- Successful payload delivery
- Trigger timestamp
- Response body from Jenkins
If delivery fails, GitHub also displays detailed error messages to simplify troubleshooting.
Step 3: Install the HTTP Request Plugin
Once Jenkins successfully receives webhook events, it must send the build result back to GitHub.
This is accomplished using the HTTP Request Plugin.
The plugin enables Jenkins to make authenticated REST API calls, allowing it to update the status of commits and pull requests automatically.
Install the Plugin
Navigate to:
Manage Jenkins → Plugins → Available Plugins
Search for:
HTTP Request Plugin
Then:
- Select the plugin.
- Click Install.
- Restart Jenkins if prompted.
Why This Plugin Matters
The HTTP Request Plugin enables Jenkins to:
- Call GitHub REST APIs
- Authenticate securely using stored credentials
- Send POST, GET, PUT, and DELETE requests
- Pass custom headers and JSON payloads
- Handle API responses for logging and debugging
Without this plugin, Jenkins cannot automatically publish build statuses back to GitHub.
Store GitHub Credentials Securely
Avoid embedding GitHub tokens directly inside your Jenkinsfile.
Instead:
- Navigate to Manage Jenkins → Credentials.
- Add a new Secret Text credential.
- Paste your GitHub Personal Access Token.
- Assign an ID such as:
github-token
Your Jenkins pipeline can then reference this credential securely without exposing sensitive information.
Best Practices Before Updating the Pipeline
Before moving to GitHub status notifications, verify that:
✅ Jenkins successfully checks out code.
✅ Webhooks trigger builds automatically.
✅ HTTP Request Plugin is installed.
✅ GitHub credentials are stored securely.
✅ Jenkins can communicate with GitHub APIs.
Completing these foundational steps ensures that build notifications work reliably and securely as your CI/CD pipeline scales.
Organizations looking to build enterprise-grade Jenkins environments should also explore Mastering Jenkins Pipelines to learn advanced techniques for building, testing, and deploying software efficiently.
Step 4: Update the Jenkins Pipeline to Send GitHub Build Notifications
With Jenkins, GitHub Webhooks, and the HTTP Request Plugin configured, the final step is to enable Jenkins to automatically send build results back to GitHub.
Whenever a pipeline finishes, Jenkins can call the GitHub Status API and update the corresponding pull request with the build outcome.
Developers immediately see whether their code has:
- ✅ Passed all validations
- ❌ Failed the build
- ⏳ Is currently running
This real-time feedback improves collaboration while preventing unstable code from being merged.
Enhanced Jenkins Pipeline
The following pipeline sends build status notifications to GitHub after every execution.
pipeline {
agent any
parameters {
string(name: ‘commit_sha’, defaultValue: ”, description: ‘Commit SHA of the PR’)
}
stages {
stage(‘Checkout Code’) {
steps {
git branch: ‘master’, url: ‘https://github.com/your-repo/project‘
}
}
stage(‘Build’) {
steps {
echo ‘Building…’
// Insert your build commands here
}
}
}
post {
success {
script {
echo “Sending ‘success’ status to GitHub”
def response = httpRequest(
url: “https://api.github.com/repos/your-repo/project/statuses/${params.commit_sha}”,
httpMode: ‘POST’,
contentType: ‘APPLICATION_JSON’,
requestBody: “””{
“state”: “success”,
“description”: “Build passed”,
“context”: “ci/jenkins-pipeline”,
“target_url”: “${env.BUILD_URL}”
}”””,
authentication: ‘github-token’
)
echo “GitHub Response: ${response.status}”
}
}
failure {
script {
echo “Sending ‘failure’ status to GitHub”
def response = httpRequest(
url: “https://api.github.com/repos/your-repo/project/statuses/${params.commit_sha}”,
httpMode: ‘POST’,
contentType: ‘APPLICATION_JSON’,
requestBody: “””{
“state”: “failure”,
“description”: “Build failed”,
“context”: “ci/jenkins-pipeline”,
“target_url”: “${env.BUILD_URL}”
}”””,
authentication: ‘github-token’
)
echo “GitHub Response: ${response.status}”
}
}
always {
echo “Pipeline finished. Commit SHA: ${params.commit_sha}”
}
}
}
Understanding the Notification Workflow
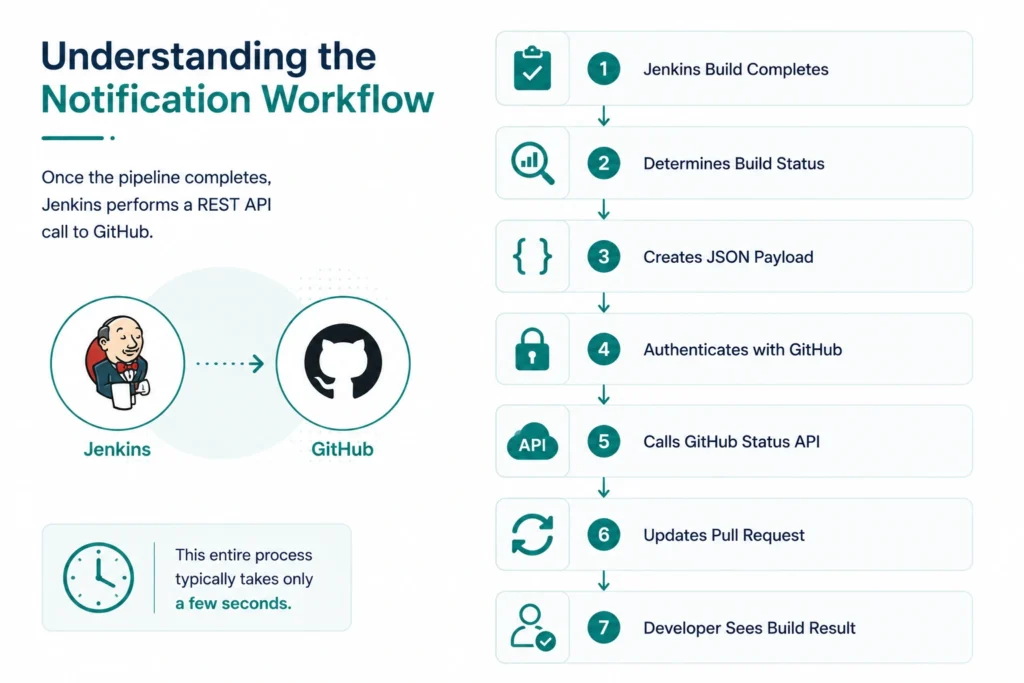
Once the pipeline completes, Jenkins performs a REST API call to GitHub.
The process looks like this:
Jenkins Build Completes
│
▼
Determines Build Status
│
▼
Creates JSON Payload
│
▼
Authenticates with GitHub
│
▼
Calls GitHub Status API
│
▼
Updates Pull Request
│
▼
Developer Sees Build Result
This entire process typically takes only a few seconds.
Understanding the GitHub Status API
The GitHub Status API allows external CI/CD platforms like Jenkins to publish build results against a specific commit.
A typical API request includes:
| Field | Purpose |
| state | Build result (success, failure, pending, or error) |
| description | Short message displayed in GitHub |
| context | Name of the CI pipeline |
| target_url | Link back to the Jenkins build page |
This information appears directly inside the Pull Request, giving reviewers immediate visibility into build health.
Step 5: Test the Integration
Once everything has been configured, it’s time to validate the entire workflow.
Follow these steps:
1. Create a Pull Request
Commit new code and open a Pull Request in GitHub.
GitHub automatically triggers the configured webhook.
2. Verify Jenkins Starts Automatically
Navigate to Jenkins.
You should observe:
- Pipeline starts automatically
- Repository checkout
- Build execution
- Test execution
- Pipeline completion
No manual intervention should be required.
3. Check the Pull Request
Open the Pull Request in GitHub.
You should now see a build status similar to:
✔ ci/jenkins-pipeline
Build passed
or
✖ ci/jenkins-pipeline
Build failed
Selecting the status opens the corresponding Jenkins build logs for additional debugging.
Step 6: Troubleshooting Common Issues
Even well-configured pipelines occasionally encounter issues.
The following table highlights the most common problems and their solutions.
| Problem | Possible Cause | Solution |
| Webhook not triggering | Incorrect Payload URL | Verify Jenkins webhook endpoint |
| HTTP 403 | Invalid GitHub token | Regenerate PAT with correct permissions |
| HTTP 404 | Incorrect repository path | Verify repository owner and project name |
| Build status not updating | Wrong Commit SHA | Confirm webhook passes the correct commit hash |
| Plugin errors | Missing HTTP Request Plugin | Install or update required plugins |
| SSL errors | Invalid certificate | Configure HTTPS properly or trust the certificate |
| Firewall issues | Jenkins inaccessible | Open required ports or configure reverse proxy |
Most integration issues originate from webhook configuration or authentication rather than the Jenkins pipeline itself.
Security Best Practices
Since Jenkins communicates directly with GitHub APIs, security should never be overlooked.
Follow these recommendations:
✅ Store GitHub tokens using Jenkins Credentials.
✅ Use HTTPS for all webhook communication.
✅ Rotate Personal Access Tokens regularly.
✅ Restrict Jenkins administrator access.
✅ Enable webhook secrets for payload validation.
✅ Grant only the minimum GitHub permissions required.
Following these practices helps protect your CI/CD environment from unauthorized access while maintaining secure automation.
Common Mistakes to Avoid
Many Jenkins-GitHub integrations fail because of simple configuration mistakes.
Avoid these common pitfalls:
❌ Hardcoding GitHub tokens inside Jenkinsfiles.
❌ Using administrator credentials for automation.
❌ Forgetting to install required plugins.
❌ Using incorrect webhook URLs.
❌ Disabling SSL verification unnecessarily.
❌ Ignoring Jenkins console logs during debugging.
❌ Not testing webhook delivery after configuration.
Taking a few extra minutes to validate each component can save hours of troubleshooting later.
Why Choose MicroGenesis for Jenkins and DevOps Automation?
Building an efficient CI/CD pipeline involves much more than integrating Jenkins with GitHub. Organizations need secure automation, scalable pipeline architecture, standardized workflows, and seamless integration across their DevOps toolchain to achieve faster and more reliable software delivery.
MicroGenesis helps organizations design, implement, and optimize enterprise-grade DevOps environments with expertise in Jenkins automation, GitHub integration, CI/CD pipeline implementation, Infrastructure as Code (IaC), Kubernetes, DevSecOps, and cloud-native application delivery. Our consultants help businesses reduce deployment risks, improve developer productivity, and accelerate software releases through automation and best practices.
Organizations planning large-scale DevOps adoption should also explore DevOps Implementation: A Roadmap to Success, Benefits, and Key Metrics for a structured approach to enterprise DevOps transformation.
Conclusion
Integrating Jenkins with GitHub to send automated build notifications is a simple yet powerful way to strengthen your CI/CD pipeline. By providing real-time feedback directly within pull requests, development teams can identify issues earlier, improve collaboration, and ensure only high-quality code reaches production.
Beyond improving developer productivity, this integration supports faster code reviews, more reliable deployments, and better visibility across the software development lifecycle. When combined with automated testing, Infrastructure as Code, security validation, and continuous monitoring, Jenkins and GitHub become key components of a mature DevOps ecosystem.
Whether you’re modernizing an existing CI/CD pipeline or building a new automation strategy, MicroGenesis helps organizations implement scalable, secure, and enterprise-ready DevOps consulting services that accelerate software delivery while improving quality, reliability, and operational efficiency. By partnering with MicroGenesis, you can build future-ready CI/CD pipelines that empower development teams to innovate with confidence.


